Three things to prepare
- Your appA desktop package matching your system.
- Your builderA coding agent ready to generate files.
- Your referenceA readable target and one small task.
Check your operating system and CPU architecture in System information or About before choosing a download.
Choose Launcher or a standalone download
ArtCraft Launcher
Install Craft Anything and manage updates from the Launcher. Choose this route if you want the shared ArtCraft app manager.
Get the official Launcher ↗Standalone package
Download the desktop package for your system. Use the release page for new versions, or add Launcher later.
Choose a standalone package ↓Standalone release packages
Match the release asset to your system. The filename examples use v0.3.0, checked November 4, 2026.
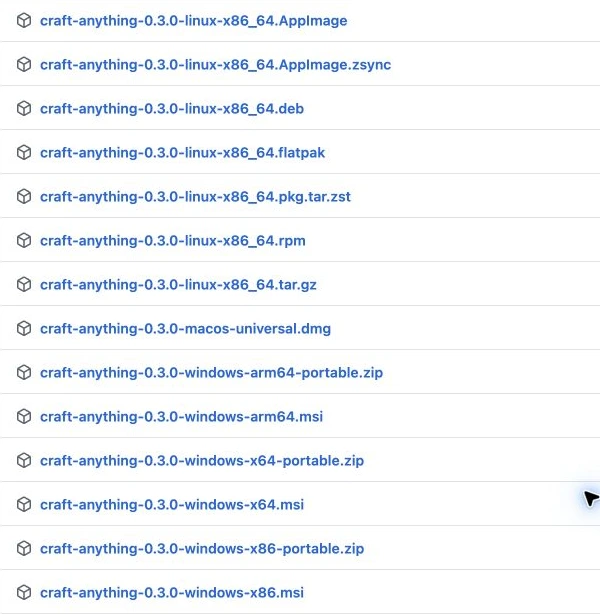
- Find your operating system in the filename.
- Match its CPU architecture.
- Choose the desktop package format: MSI, DMG or your Linux format.
See package filenames and architecture details
| System | Filename or format | Choose it when |
|---|---|---|
| Windows x64 | craft-anything-0.3.0-windows-x64.msi | You want the installer path. |
| Windows x64 | craft-anything-0.3.0-windows-x64-portable.zip | You want to extract and run the portable package. |
| macOS | craft-anything-0.3.0-macos-universal.dmg | You want the universal desktop app. |
| Linux | AppImage, DEB, RPM, Flatpak or archive | The architecture and distribution match the selected asset. |
The source-code ZIP is for working with the source. It is different from the prebuilt desktop app. A standalone CLI archive is also a different package; you do not need it just because you see Rust mentioned in the repository.
Windows also has arm64 and x86 assets in this release. Choose the architecture shown by your system information; the x64 filenames above are examples.
Install and open Craft Anything
For Launcher, install the app manager and choose Craft Anything in it. For a standalone package, follow your system below.
Windows: installer or portable launch
MSI installer
- Open the downloaded
.msifile. - Review the installer prompts and complete installation.
- Launch Craft Anything from its installed application entry.
Portable ZIP
- Extract the complete portable archive to a folder you can keep.
- Open that extracted folder and launch the application inside it.
- Keep the accompanying files together. Do not run the app from inside an archive preview.
macOS: universal DMG
- Open the downloaded
.dmgdisk image. - Move Craft Anything to Applications, then open it from there.
- Review any macOS prompt. Confirm the file came from the official project before proceeding.
For the bundled desktop app, the project documents an included CLI. The separate CLI-only download is intended for a different workflow.
Linux: package and distribution
Choose the architecture and format supported by your distribution. Open a DEB or RPM through the matching package manager, or follow the release instructions for the AppImage or Flatpak.
Keep the selected format in your notes: an app inside Flatpak has a different environment from a host-installed program. The official integration notes describe separate Claude Code configuration inside that sandbox.
Read the official Linux download instructions ↗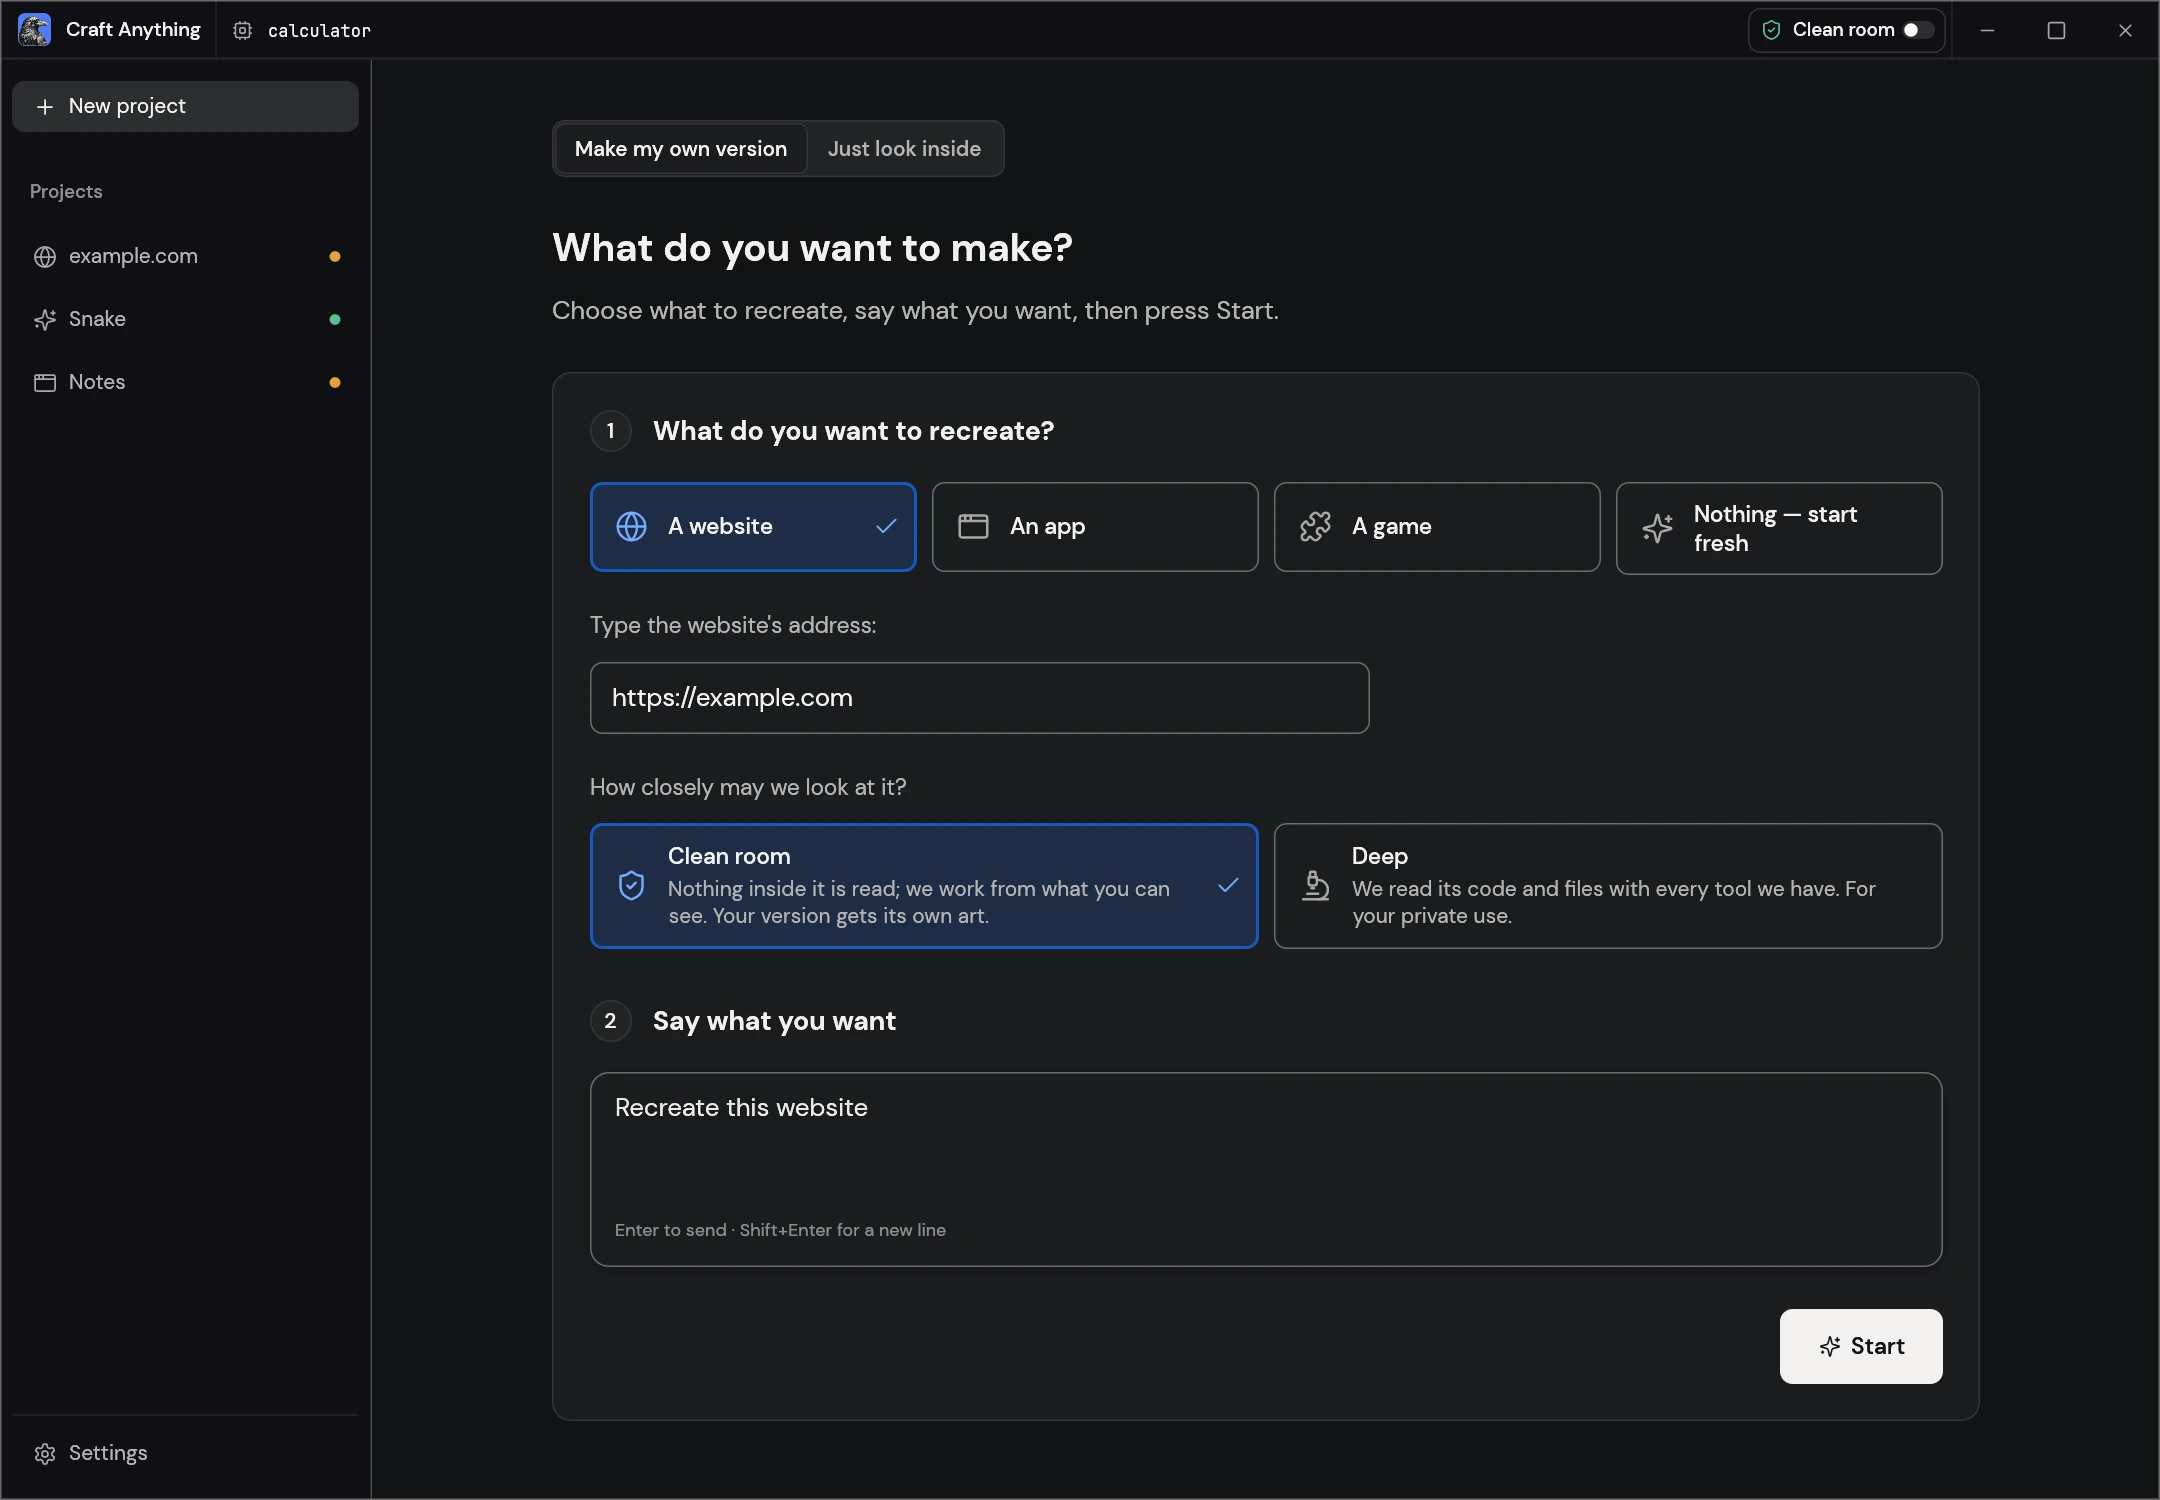
Choose New project in the left sidebar to reach this form. If your app opens the technical workbench, select Simple in its toolbar:
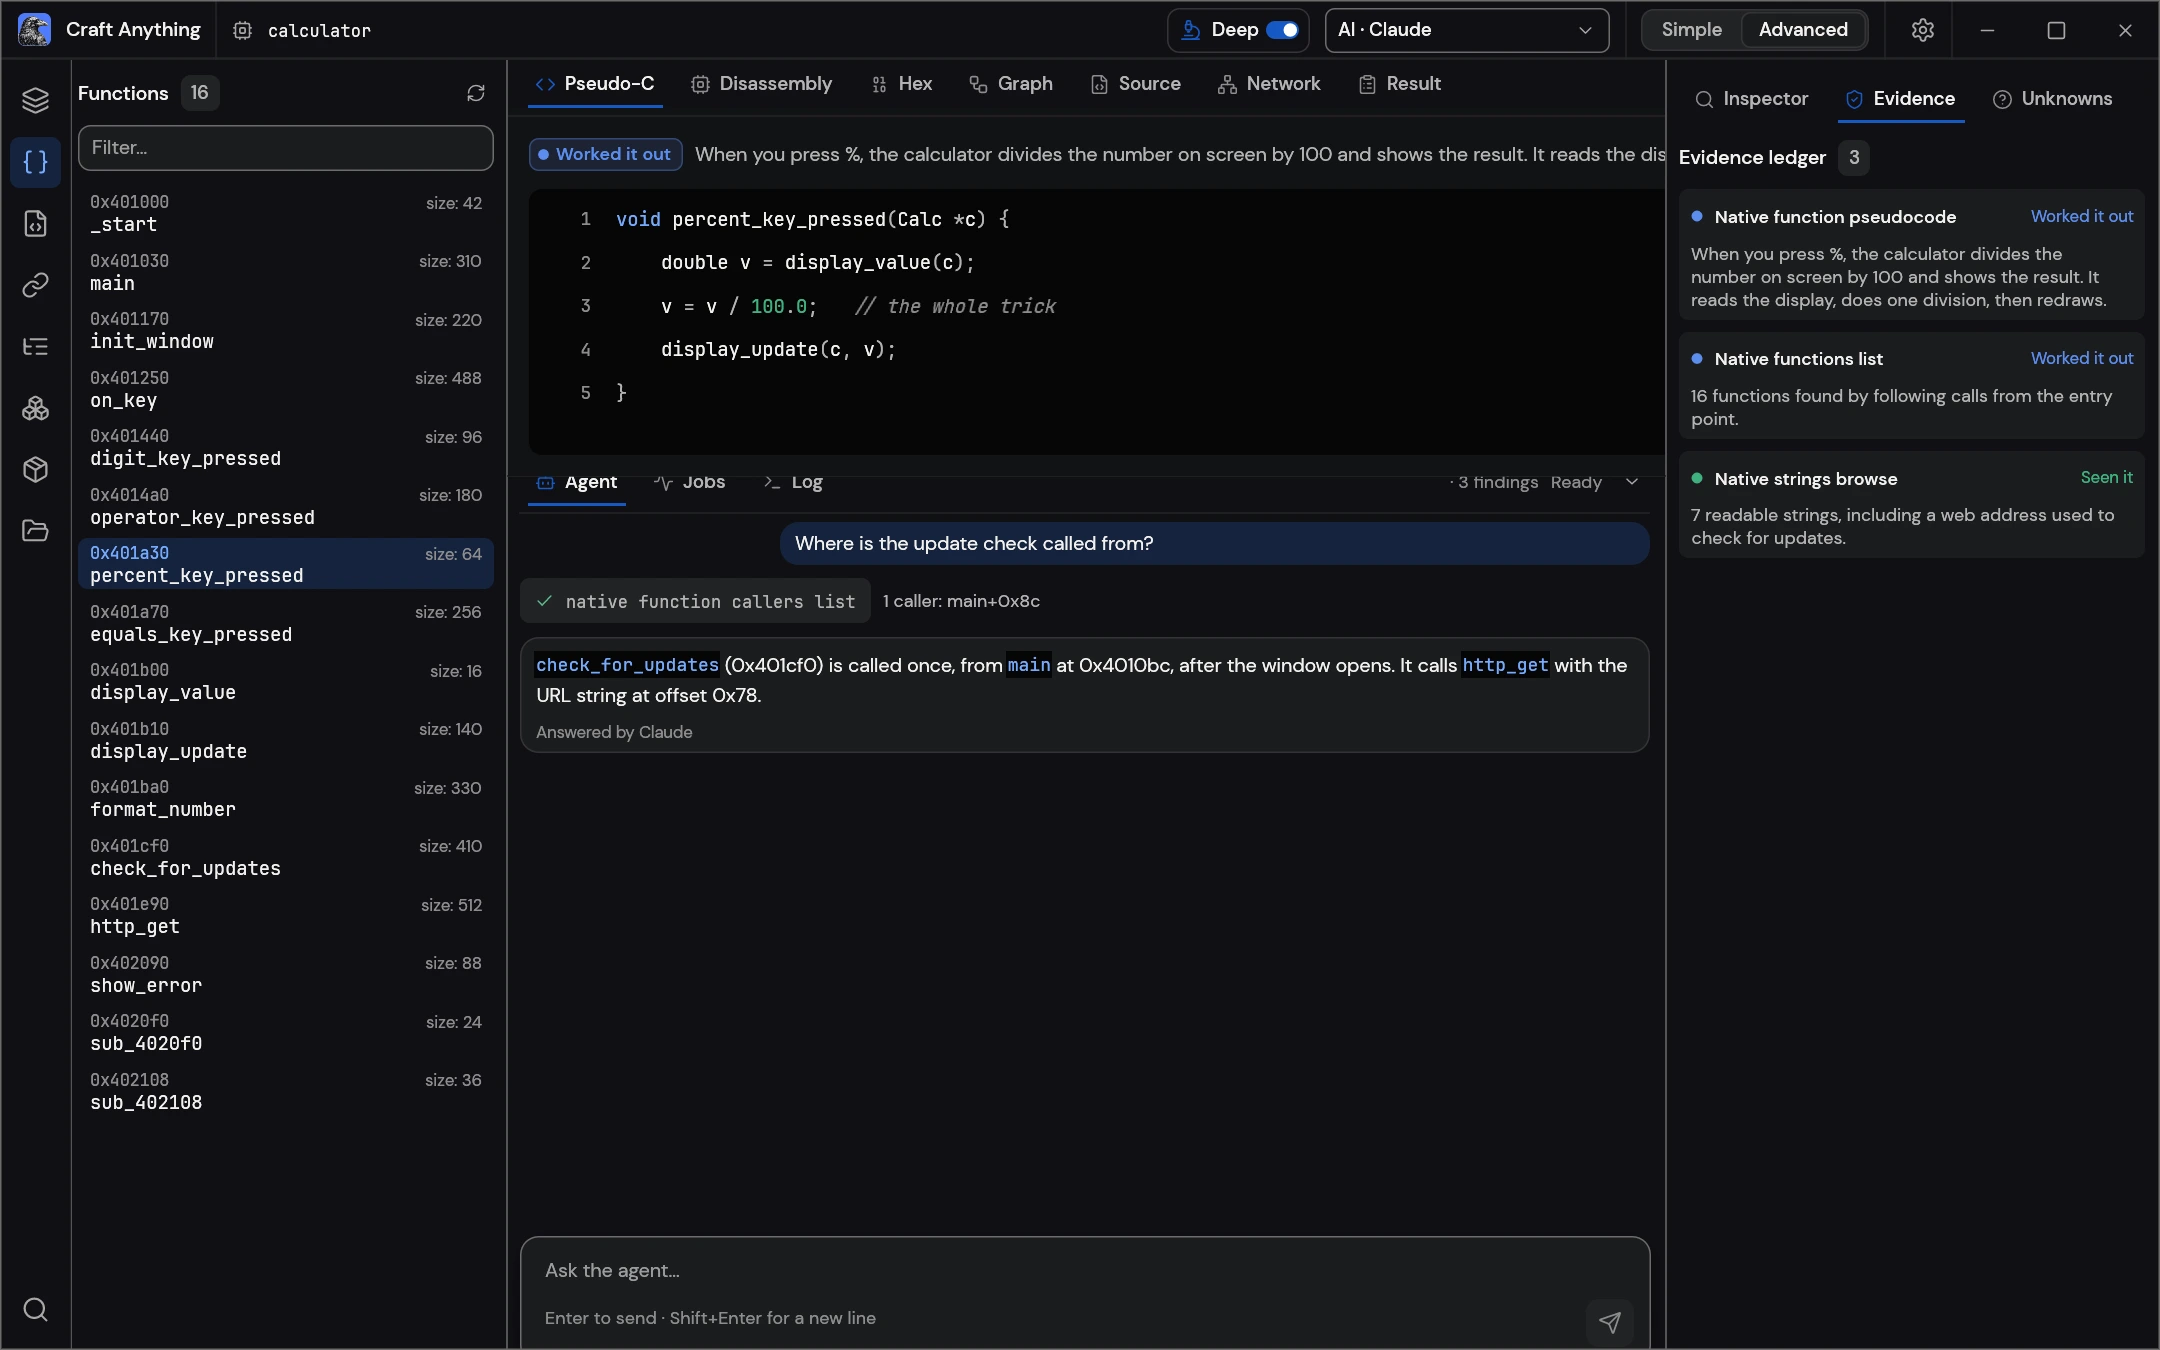
After opening the app, look for its project creation view. If launch fails, record the package filename, system version and exact message before trying another package.
Choose a model for questions and analysis
Study and ask questions
Select the provider and model you want for questions and analysis. The official project lists Anthropic, OpenAI, OpenRouter and local OpenAI-compatible servers.
Using a local server?
Start the service, check the model identifier and confirm that the endpoint is reachable from the app. For Ollama, confirm that your version provides the compatible endpoint you selected.
Check local-model connection problems →Project generation uses a coding agent, prepared in the next section. Read the official AI roles and support notes ↗.
Prepare Claude Code for builds
Craft Anything runs the Claude Code program installed on your computer. Check the program, complete its sign-in and restart the app before building.
Check that the program is available
Open a terminal on the computer where you will run the build. Check the installed program:
claude --versionIf the shell cannot find it, use Anthropic's official setup instructions. After installation, open a new terminal and repeat the version check. Then restart Craft Anything so it can discover the available program.
Complete sign-in and startup checks
claude auth statusIf the status says you are not signed in, run claude auth login and complete the provider's own flow. Recheck the status afterward. Your account's terms and usage limits apply.
CLI startup and Flatpak notes
Before a build, Craft Anything also checks whether craft-anything-cli starts. If it reports a missing or unstartable tool server, keep that exact error and use the tool-server checks. Check that startup error before changing external-client configuration.
Source: official Claude Code integration notes. These notes explain the startup commands and the Flatpak-specific environment.
Confirm you are ready to start a project
- The desktop app opens.
- You know which release and package you installed.
- Your coding agent is available and signed in before you start a build.
- Your reference opens as the intended page, and you have defined the result you want.
- You have chosen a project location and understand your builder's usage costs.
If one condition fails, address that condition before asking for a large build. Find the matching setup or build symptom.